
For a few years until the end of last year, I was the coordinator of my sewing group. A few weeks ago, at our end-of-year Christmas party, the group surprised me with a thank-you gift – a box of fat quarters. I think everyone in the group contributed one or two fat quarters that she thought I would like.
Also at our end-of-year Christmas party, I was lucky enough to receive another bundle of fat quarters in the Kris Kringle gift swap. I decided to include those in the box too. I had a real stash!
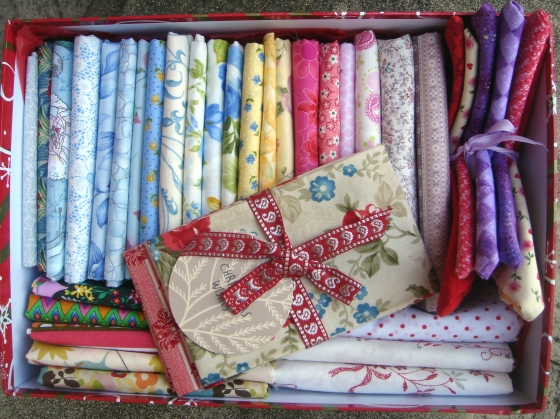
My sewing group gave me a lovely box of fat quarters.
Because the group had given me so many lovely fabrics, I wanted to make a quilt that used as many of them as possible.
Saying that, I did squirrel away a few for other projects. I have a collection of Civil War fabrics that I am saving for a project, and two fabrics were set aside for that. A few others, such as three lovely orange-based fabrics, which remind me of the retro designs of the 1960s and 1970s, and three red-and-white prints, my favourite colours, were also set aside for special projects. I vowed to add one fabric for every one I took out.
Once I had sorted through my box of treasures, I had a collection I felt would work together.
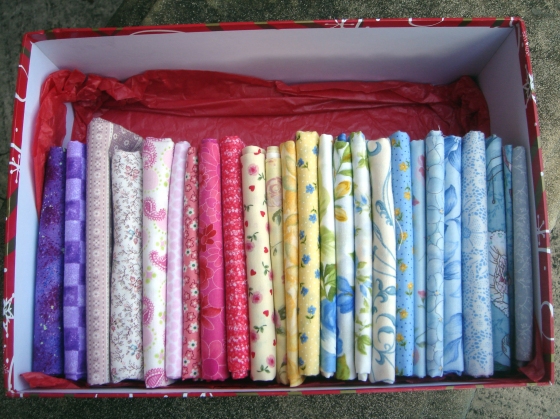
I now had a collection I felt would work together.
Then, I had to decide what to do with them! Somebody had mentioned ‘scrap quilt’ at the Christmas party, and the idea stuck in my head.
I have a lever-arch file in which I keep magazine cuttings of quilts and quilt ideas I like. I do not have space to keep all my quilting and craft magazines, so I just cut out and keep the bits I particularly like, be it a picture of a whole quilt, a colour combination or an appliqué design. I found myself drawn to the one-block scrap quilts, especially those with triangles, and the two-colour quilts. A big source of inspiration was Erica Spinks’s blue and white quilt ‘Pyramids from the Stash’ quilt (Down Under Quilts, no. 70).
I also looked online and really liked Squares and Triangles’s two half-square triangle quilts.
As I already had a set of equilateral triangle templates I had bought for my recycled jumpers blanket, I now knew what I would do! (Okay, so I struggled to decide even then without the help of my mum!)
I liked the idea of a simple, one-block quilt as I wanted something I could make fairly quickly. I tend to choose slow, complex projects that involve complicated piecing, hand appliqué or even redwork and take a year to make. I thought a simpler project would be nice, and it would give me something to do in the heatwave. We had a freakishly hot week between Christmas and New Year when every day was above the old 100 degrees fahrenheit. Too hot to go outside, I stayed in the air-conditioning and sewed.
I raided my existing stash for more fabrics in similar colours. As I had not been given any green and I had set aside the reds I loved so much, I decided not to include any prints with green backgrounds or true reds. I included some very bold watermelon pinks, another colour I love, which I felt was almost red. I had been given some bold pinks and felt they needed company.
When deciding which fabrics from my stash to use, I chose those I just had small pieces of. If I had less than a fat eighth of a print, it went in.
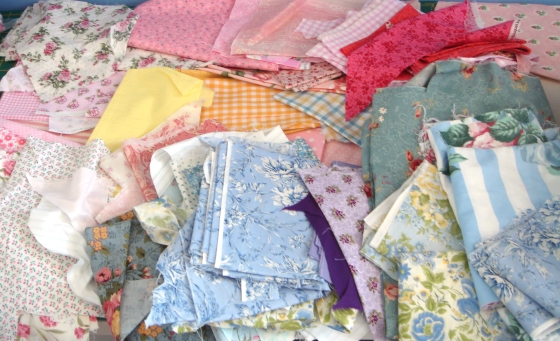
I pulled out all the pink, blue, yellow and purple fabrics from my stash.
At this stage, I had not really calculated how big I wanted it to be, other than ‘bed sized’ and ‘squarish’. I bought 4 metres of white fabric as that seemed about right.
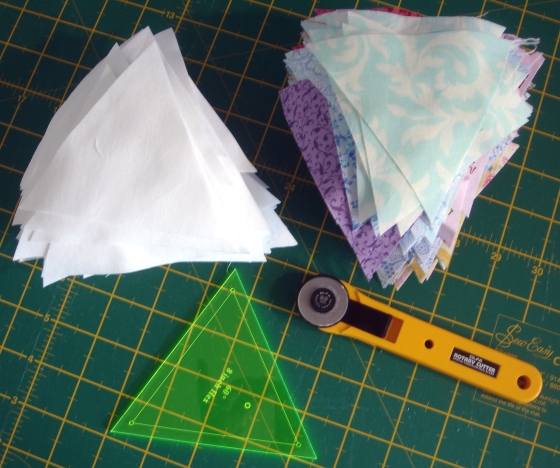
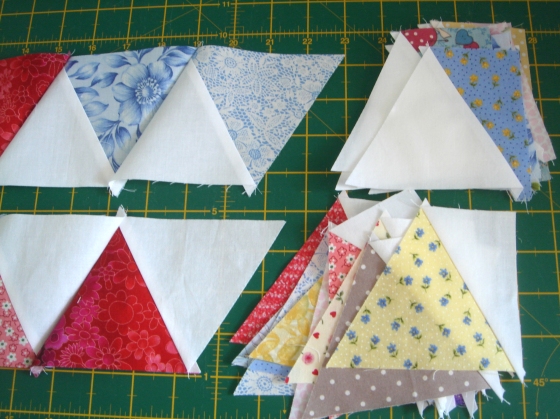
After washing all my new fabrics, I started cutting triangles – lots and lots of triangles. The Matilda’s Own template I was using allowed me to cut 4-inch strips and then cut the triangles from the strips.

Cutting was made easier by starting with strips. Each 4-inch strip across the width of the fabric gave me 16 triangles and some scraps for end bits.
When you think you have cut enough triangles, keep cutting!
I chain-pieced them in pairs in batches as I cut them, only doing the calculations to figure out how many I would need after I had cut and pieced about half of my white fabric.

As you can see, my rose bushes are in bloom!
When piecing, I was careful to pay attention to the grain direction so that the fabric grain would run across (and down) the quilt.

I felt it was important to pay attention to grain direction when piecing triangles.

I checked the grain direction again when chain-piecing pairs of diamonds.
Once I had sewn all the pairs of triangles together, I separated them into two piles for the odd and even rows of my quilt. I pressed all the seams in the odd rows one way and all the seams in the even rows in the opposite direction. That helped me later when it came to piecing the rows together.
In total, I cut 621 white triangles and 621 coloured triangles. My quilt has 27 rows, each with 46 triangles. That is 1242 triangles! On top of that, I also cut the end bits, the 54 half-triangles needed at the ends of the rows.

I made a plastic template to help cut the end bits, but I then realised that my 4½ square had all the markings I needed.
After I had pieced the rows, I added the end bits.
Once all the rows were pieced, I was a little cautious when joining them together. I wanted to be sure that my points matched and stayed nice and pointy, so I tacked the rows in place with a long machine stitch. I then checked the seams, adjusted them if necessary, and resewed at a normal stitch length. I only had to adjust about half a dozen points, but the ease of unpicking the tacking stitches made this extra step worthwhile.
The points matched fairly easily, and I only needed one pin to hold each junction in place. However, this stage was very time-consuming just because there were so many points. For this reason, I would not recommend this design for anyone who hates matching points!
I now have to quilt and bind it. As the finished quilt top is about 88½ inches square, big enough to cover a queen-sized bed, I would need three lengths of fabric for the backing. I am thinking of just using two lengths and including some of the leftover scraps in a pieced backing.
I will be sure to post an update when I figure out what to do next!

This is just the finished quilt top. I have yet to quilt it.

I thought a hexagonal pattern would be more obvious, but it is not.
If you plan to make a quilt top like this yourself, you need:
- a lot of scraps
- about 4 metres of plain quilting muslin
- a big (800 metre) roll of thread for all that chain piecing
- a good-quality template in your chosen shape (I used Matilda’s Own large triangles)
- 2 rotary cutter blades as one will go blunt partway through the cutting
- a lot of patience.

It looks so beautiful! The colors are great. Your granny Maud would be proud! 🙂
Oh love this! Well done! I’m working on a triangle quilt right now, too, but not scrappy – LOVE yours!
I look forward to seeing pictures of your triangle quilt. One of the most fun things about this craft is how people take similar ideas and end up with different, but equally great, results.
WOW Carla, i love your quilt, you must have been a real mission. Cant wait to see the real thing quilted. Debx
You have far too much time on your hands! Don’t know how you fit it all in… I love the triangles.
Phil
How did I fit it in? I had a week off work and it was far too hot to go outside!
Wow the quilt is amazing, I have got as far as choosing a pattern for my collection. It is in the queue to make up.
Nicely done! I love the equilateral triangles and the soft colors you used. Beautiful (and queen sized too)!
Impressive! My Mum makes quilts so I know how tricky all the precise cutting and sewing can be. That’s a lot of triangle points to line up. You’ve done a fabulous job!
I think if I had done the 1242 calculation before I started, I might not have been brave enough to begin.
Oh, your quilt is simply gorgeous. Thanks so much for the link to my blog!
I think it is vital to give credit where credit is due – for patterns you use and ideas that inspire. Thank you.
Beautiful! The colours are so lovely.
I cannot take any credit for the colours as the fabrics were all given to me by my friends.
Pingback: Evolution of a scrap quilt (part two) | Granny Maud's Girl
Pingback: Quilt label tutorial | Granny Maud's Girl