I am busily putting the finishing touches on Christmas presents, including one quilt that needs a label before it can be given away.
I thought I would share how I make my quilt labels. This is not the only or best way to make a quilt label; this is simply the method I use.
When I started quilting, I did not label my quilts. I am a recent convert to the idea of labelling what I make, so much so that I went back and sewed labels for any quilts I had sitting in my cupboard. I would not make a quilt without a label now.
Materials
To make a label like mine, you need:
- a computer and a printer (optional)
- a small piece of fabric, either to blend in or contrast with your quilt back. I often use white scraps
- a small piece of very lightweight fusible interfacing (optional)
- a lightbox or a window (optional)
- a fabric marker, 2B pencil or Frixion pen
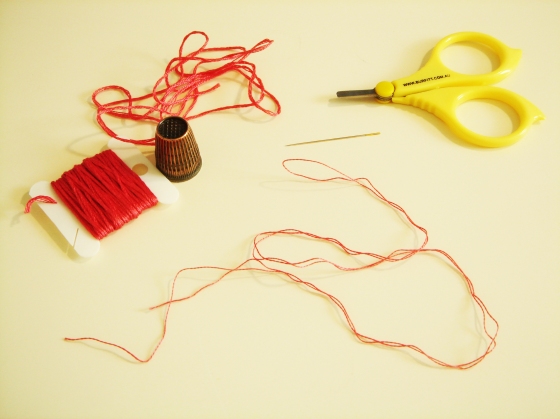
- embroidery thread and embroidery needle
- regular sewing thread and the usual sewing supplies.

Start with text, embroidery thread, fabric for your label and lightweight fusible interfacing (optional).
I cut out a scrap of fabric a bit bigger than the finished size of my label and iron a piece of lightweight fusible interfacing to the back. The interfacing is very much optional. It makes the embroidery a little easier, but it does stiffen your label (and, therefore, your quilt). If you do use interfacing, make it the lightest weight you can find.
Step 1: write the text
I start by deciding what I want the label to say and typing it up on my computer. My handwriting is not the neatest, so I like to type the text in my computer, using an attractive font, and print it out to trace it onto the fabric. I then follow the traced lines with my embroidery. If you have neat, elegant handwriting, unlike mine, you will not need the computer.
I usually include the bare essentials in a label:
- the quilt’s name
- the maker’s name
- the year it was finished
- who it was made for.
You can add as many details as you like, such as where it was made, the special occasion it was for, etc. I keep my labels simple because every extra word is embroidered, which takes time! I really like the idea of adding washing instructions, for example, but I have not the patience to sew all that.
Perhaps it is because of my day job, but too often I see spelling and apostrophe mistakes. Get a second pair of eyes to read the text before you trace and sew it. We all make boo-boos, but it is such a shame to realise it only after you have spent ages sewing a label.
Step 2: trace
Once I have the text printed on paper, I use my lightbox and trace the design in 2B pencil, figuring that the embroidery thread will cover any lingering pencil lines. If you have one, a proper water-soluble fabric marker or similar would probably be more sensible. A Frixion pen can also work.

I used a Frixion pen, the ink of which disappears when you iron it, to write the text for this label. It is very easy to see the lines and, if the lines do not disappear completely, they are hidden beneath the embroidery.
Step 3: embroider
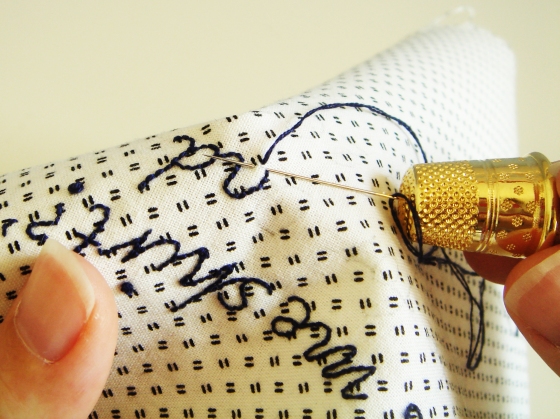
I use two strands of embroidery thread and a small backstitch to sew my labels. You can use any stitch you like.
I learned a clever trick to start your embroidery neatly when using an even number of strands. Instead of cutting your embroidery thread the length you need and separating out – in this case – two strands, cut it twice the length you need and only separate one strand.
Then, fold the thread over double and thread it through the eye of the needle, with the loop or fold as your ‘tail’ end.
Starting from the back of your work, push the threaded needle through the label, leaving the tail loop on the back. When you push your needle to the back again, catch the thread in the loop, securing the end. How easy is that!

Push the threaded needle from the back of your work to the front, leaving a small loop at the back. Make your first stitch on the front. As you push your needle to the back, wrap the loop around the needle. When you pull it tight, you will have a secure and neat start to your embroidery.

I like to use two strands of embroidery thread and a simple backstitch for my labels (with French knots for dots), but you might like to experiment with other stitches, like a stem stitch.
Step 4: trim and turn
When the embroidery is finished, trim and neaten your labels so they are ‘square’. Then, turn under a narrow hem for a neat edge.
Step 5: sew the label in place
I use matching thread to sew the labels down. You could use embroidery thread and add a decorative embroidered border to your labels as you sew them on.
Strategic placement of your label can hide a boo-boo on the back.

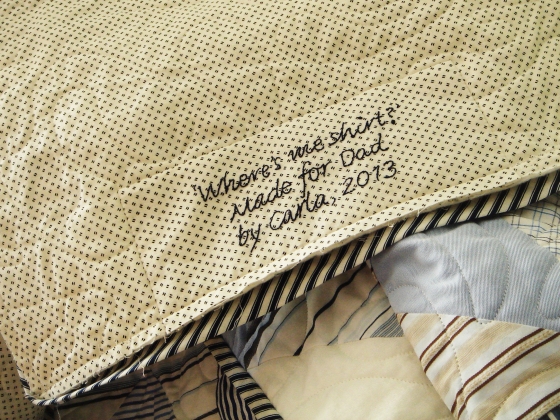
I usually put labels on a corner. This label moved so it could conceal a pucker in the quilting!
The pucker was my own fault as the backing was not quite big enough. I machine-sewed the binding on, then hand-sewed the label in place on three sides. I then ran another row of machine stitching to hold the fourth side of the label down.
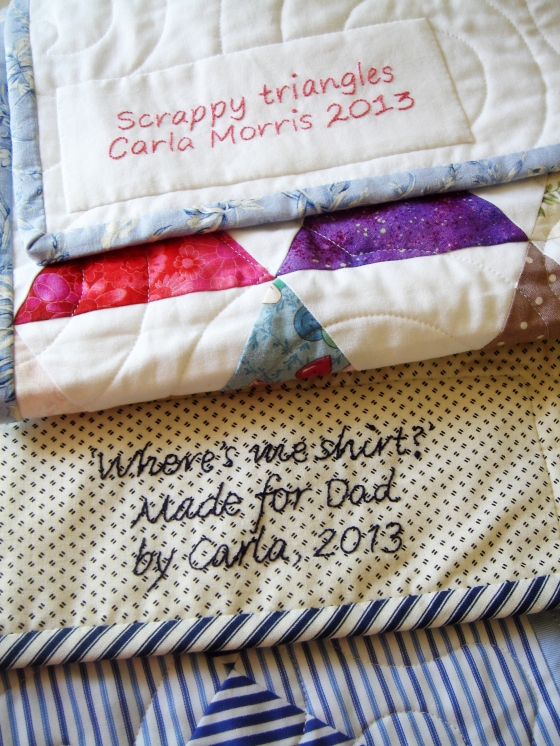
These two quilts, my shirt quilt and my scrappy triangle quilt, have been works-in-progress for a while now. With their labels complete, they are finally finished!
Of course, you could just grab a permanent fabric marker, write a label and sew it on. That would be sensible and much simpler. Saying that, it is surprisingly quick and easy to embroider a label. Which method do you use?


By the time I come to label a quilt, I don’t want to devote too long to the label, because it’s usually overdue! I use a permanent marker with a fine nib, some iron on interfacing to stabilise the label fabric and either turn the edge under or use pinking shears to finish the edge. But I am considering embroidery on a very lightweight interfacing, which can then be ironed onto the backing and will almost disappear…
That sounds interesting. I’ll have to watch your blog to see how it goes.
Cheers! Looking forward to making my first label!
Your first? You are tackling such challenging and interesting projects, I thought you were a seasoned quilter!
lol! Nope just too daft to know any better. . 😉
Aha! You and I are from the same school of thought: bite off more than you can chew and then chew like crazy. Trying something new and challenging is half the fun. 🙂
I also always label my quilts- I like to think that in the future my quilt ‘history’ will remain…. Sometimes I embroider, mostly I use a permanent marker! Yours are great- very neat!
I suspect mine will all end up as dog beds, but that’s ok. I have such fun making them!
I love that attitude. I am trying to work my way towards that same cheerful outlook. And I was one of those people who embroidered jeans and shirts for everyone in the 70’s so your label methods will be fun to use.
With all that embroidery under your belt, you will find embroidering quilt labels a breeze!
Thanks for the tip re the easy knot–brilliant! I just embroidered a label for my in-law’s quilt and used 3 strands, but you are so right–2 (or 4) would work perfectly. I embroider labels for quilts that will be laundered. I worry that ink from permanent markers will eventually fade from all the washing (tho’ I have no evidence of that–I am just a worrier!). For mini-quilts/wall hangings, I design labels on my computer then reverse print them on iron-on transfer paper, iron them onto a piece of fabric, and then sew them onto the back of the mini-quilt.
Me too! I worry how permanent a permanent marker is although I also have no evidence they might fade.
Hope Dad likes his quilt! Have a great Christmas Carla!
I also hope he likes it! Thanks for the hourglass block tips that made it possible, Shari.
Pingback: Two finished quilts! | Granny Maud's Girl
I love your tip on how to start your stitching so neatly too.
Thanks. It was a bit of a lightbulb moment for me too when I first learned it.
Great tutorial. Thank you for sharing
….Izz
You are welcome! I hope it helps.
Thanks for sharing your method for making labels. I sometimes like to use reverse appliqué and have the verbiage in the middle of the appliqué – but it all comes down to how much time you have or want to devote to the label – for me including a personalized label with a special message just adds a ton to the quilt. 💗
I like the idea of an appliquéd label on a special quilt, Jean.
I’m all for putting labels on quilts, but future generations may not know who the quilt was made by or who it was made for if you don’t include full names. Who was “Dad”? Who was “Carla” and where did she live? It takes a little more time and effort, but the results are worth it. I like the idea of embroidering labels!
You are absolutely correct. Usually, I embroider my full name as a bare minimum. However, in this case, I can picture my dad saying, ‘Which other silly Carla would be making ME a quilt?’ Sometimes we have to adjust to suit our curmudgeonly recipient. 🙂
I usually use permanent marker an include as much information as I can. This includes full names (for my dad, Alvin G. East), my location, date finished, fabric content,batting content,name if quilter if other than myself. If I can work it in, I put the info on something i applique to the quilt (a small Sunbonnet Sue or just her bonnet) If I ever finish my son-in-law’s quilt, I’ll put the info in the state of Texas appliqued on the back. I’ve started printing washing and care instructions on a card trimmed by pinking shears, punching a small hole in the corner of it . (I think the small hole made by my tiny hole punch looks so professional.) Then run a small ribbon through , tying in a knot. I then use a small safety pin to attach it to the quilt front corner so it cant be missed.
I am not a fan of plain marker labels (if you saw my handwriting, you would understand), but I like your idea of making them fancy by appliqueing shapes and the like. I also think adding more information as you do is wise. I tend to be a bit lighter on details than I should be as I embroider everything, and every little stitch takes time.
I recently started using ready-made swing tags bought from a craft shop for my washing labels. I think they sound a lot like yours – ribbon, safety pin and all. Those I do hand write!
Love the idea of neatly starting embroidery with a loop vs a knot or hiding “tail end” after work has progressed a bit. So clever, so very neat
Love your label approach. Can you share the name of the font you used for the “Where’s my shirt?” label. Seems like a clear font for embroidery. Thanks!
thank you so much for this tutorial! France Houde from Montreal, Canada.
I have struggled with labels. This is a huge help to me! Thanks
I also have been embroidering the persons name to whom I was giving it to and my name. My mother is in a nursing home now and I made her a lap quilt. Since things sometimes tend to walk off, I embroidered her name into one of the bottom corner blocks instead of putting on a label.
When using the fabric marker, I use a hot dry iron to go over the writing and that is supposed to set the ink so it won’t run. I have asked my grandkids and daughter how the label looks and they showed it to me and it was fine.
Hello and thank you for your instructions. I could not see anywhere what size (how tall) the font of the letters is. I am about to tackle my first label this way and it would be helpful to know.
I’m working on a quilt where I want to use a spare block as a label. I hate hand sewing, so the fact that I’m even considering embroidering a label is kind of a lot. I was considering piecing the extra block/label directly into the quilt backing as I’m piecing the backing together. But then the embroidered label would get quilted over, and I’m not sure how that would work. I do straight-line quilting on my home machine, and not the kind where it’s a million lines super close together. So it might be OK. I dunno… Is this the worst idea ever? LOL Thanks for a great tutorial!
This is really the best tutorial I’ve found. Thank you
LOVE the thread loop start! No more knots! I love appliqueing a special label for all my quilts. I include a little shape that matches the quilt. A strawberry and a couple leaves and tendrils for a strawberry pieced quilt. Little bird on a branch for a bird quilt. Tiny flowers, little triangle banner. I find it very fulfilling and it is so easy to find the little shapes and doodles on the computer. Sometimes I make a matching block from the front in miniature and embroider on that. It just makes me happy to have the extra touch!