Last year I made five or six peg bags. You would think I had enough, wouldn’t you? But no! I gave them all away and realised when my wicker peg basket started to fall apart this month that I had nothing to replace it with.
Peg bags are simple to make and are great for using up bits of fabric in your stash, so I thought I would share how I put mine together.
If you are inspired by this tutorial and have a Flickr account, I would love to see pictures. Please post a photo of your peg bag on the Granny Maud’s Girl stuff Flickr group.
These bags can be for anything. One friend I gave a peg bag to last year has decided to hang hers in her wardrobe and keep delicate stockings in it. Fortunately hers was one without the word ‘pegs’ in big letters across the front!
Apart from the usual sewing supplies, such as thread and a sewing machine, for each bag you will need:
- paper or lightweight interfacing for your pattern
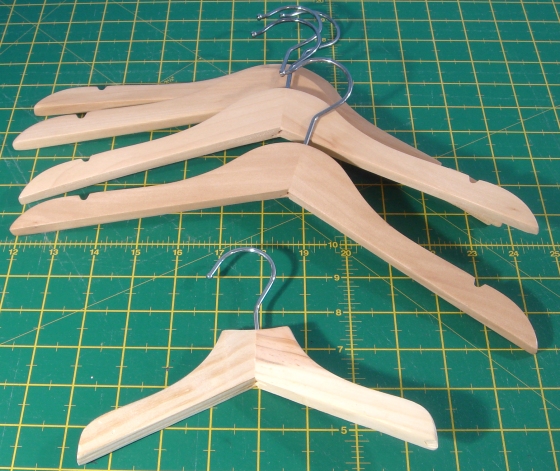
- 1 children’s coathanger (Ikea sells a five-pack of wooden coathangers, hänga, which are a perfect size)
- 2–3 pieces of coordinating fabric, each at least 18 x 15 inches (46 x 38 centimetres), depending on the size of your coathanger
- 1 piece of lining fabric for the front facing, at least 18 x 15 inches (46 x 38 centimetres), depending on the size of your coathanger
- about 28 inches (70 centimetres) of ribbon
- scraps of fabric and Vliesofix (Wonder-Under) for appliqué (optional).
You can use any fabrics for the outside of the bag. I often use curtain and upholstery fabric offcuts (especially curtain fabric without the plasticky UV layer on one side), either left over from my own curtains or from the bargain bin of a local fabric store. This project is also quilter’s fat-quarter friendly.
The lining fabric for the front facing is not seen. Inexpensive calico or homespun is perfect.
Step 1
Draw up a pattern as follows. Your pattern will depend on the size and shape of your coathanger but is quick and simple to draw.
Start by measuring the width of your coathanger from side to side, then follow the diagram.
If your coathanger has a trouser bar, I suggest lowering the opening to avoid it and adding a bit of extra length to the bottom of the bag.
My first hole template was a large saucer. Find a bowl or plate about the right size and trace around it. The opening needs to be large enough to allow a hand clutching a fistful of pegs in and out.
If you have farmer’s hands like my dad’s, make the hole bigger. If you make the hole much bigger, I would also make the bag a bit deeper. (Watching dad get his enormous hand into a biscuit jar, grab a biscuit and get his hand out is fun. He now knows to just tip my jar so the bikkies come to the edge.)
Step 2
Use your pattern to cut out the front, back and lining (facing) pieces.
Cut one piece of the lining fabric for the front facing. From the other fabrics, cut one piece for the front, one for the back and, if your fabric is not double-sided, cut one for the inside back. Woven and solid fabrics are often double-sided; printed fabrics are not.
Before you cut the inside back, look at where the hole is going. Do you want part of the design to show through the hole? When you cut the front piece, do you want part of the design framing the hole?

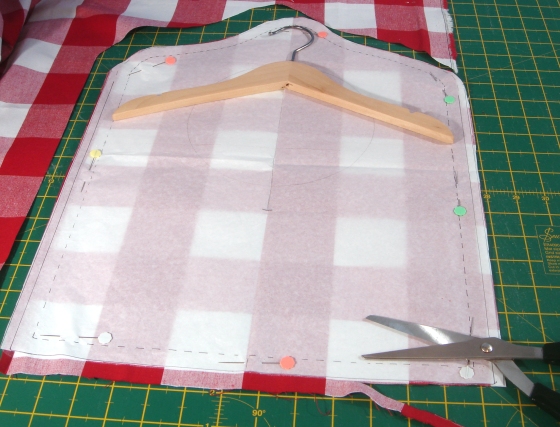
Here I have cut two pieces of red check for the front and back, one of white for the front facing and another of white for the inside back. I have also ironed the Vliesofix to the back of a fabric scrap for the appliqué.
Step 3 (optional)
Appliqué ‘pegs’ onto the front of the bag, being sure to avoid the area of the opening.
I traced a mirror-image of the text onto the smooth side of a piece of Vliesofix, before ironing it to the wrong side of a scrap of fabric. When I had cut out the shapes and ironed them in place, I used Sulky machine embroidery thread and a blanket stitch to sew them down.
You can use my text template, or choose a font you like on your computer and print your own.

Arrange the appliqué pieces, being careful to avoid the opening, which I have marked here with templastic and pins.
You can use any appliqué method, omit the appliqué altogether or decorate the bag in any way you like.
Step 4
Make the hole.
- Put the front and front facing right sides together.
- Mark a circle on the wrong side of the front facing, and sew along the line you have drawn.
- Cut out the centre, leaving a narrow seam allowance. Clip the seam. It needs to be well clipped to sit flat.
- Turn the two pieces right sides out and press.
- Topstitch around the circle to hold it in place.

Mark the opening on the wrong side of the front facing, then pin it to the bag front, right sides together.
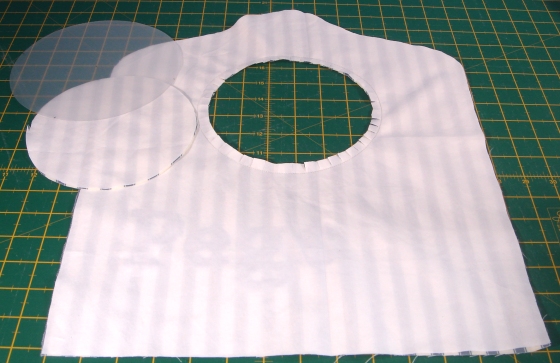
Once you have sewn along the line of your drawn circle, cut out the inside, leaving a narrow seam allowance. Clip the seams.
Step 5
Sort the pieces for your bag into front and back.
Your front and front facing will already be attached through the hole. I like to also machine tack around the edges of the front layers, within the seam allowance, to help prevent them shifting later.
If you are using two layers of fabric for the back, place them wrong sides together and machine tack around the edges. Obviously, if you are only using one piece of fabric for the back, you can skip this step.
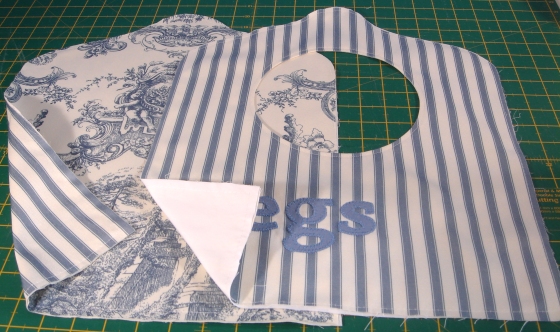
Machine tacking around the edges of your front and back pieces will help when sewing the layers together. It also helps to avoid confusion with so many layers!
Step 6
Thanks to the machine tacking, the front and back will now feel like only one piece each.
With the outsides of the bag facing, line up the front and the back, pin and machine sew along the seam allowance, leaving a small opening (about ¾–1 inch) at the top for the coathanger’s hook to poke through. If you have a walking foot, use it.
Back stitch on either side of the opening for the hook. I also like to add extra reinforcing stitching on the bottom corners.
Step 7
Finally, overlock or otherwise finish off the seams, clip the bottom corners, turn inside out and insert your coathanger.
Decorate by tying a bit of ribbon to the top.
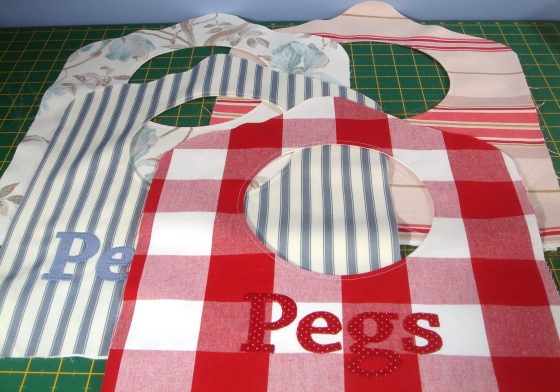
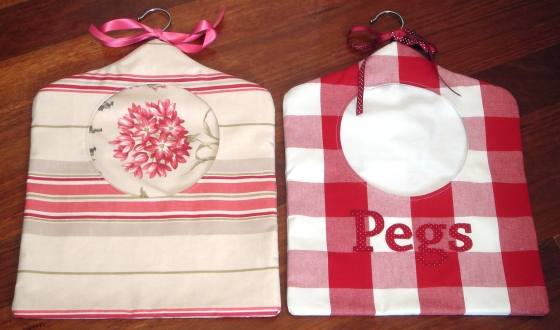
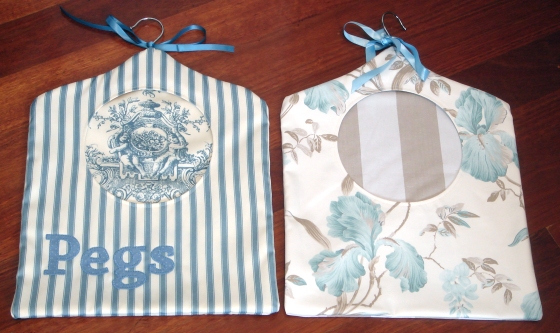
I made four bags as I had four children’s coathangers. Rummaging in my sewing cupboard, I also rediscovered this tiny coathanger, which I acquired when I bought my small dog a coat. How cute is that? Now I need ideas for a craft project that uses this ridiculously small coathanger.





What a great idea! Thanks for sharing.
Love
NikkiM
and I thought you had no time for any new crafts????
Screen printing is new to me. Sewing is not! 🙂
These would be great for storing crayons, nicely put together – thanks!
The tiny coat hanger would be the perfect home for a doll’s dress! I am wondering where you found it. I need some.
The small one was from a pet store. It came with a knitted jacket I bought for my small dog. Her other coat didn’t have a hanger at all, so it was a lucky accident.
how do you get the coat hanger in….do i need to make the circle opening big enough to get it in and out?
Pingback: Versatile Blogger. . . | lalinsocal
They’re really lovely! I’m making some for Christmas pressies and needed inspiration. I now have it – thank you!! 😀✂️😀
Oh, good! I would love to see photos when you have them made.
Nearly finished! Not as nice as yours tho. I didn’t make a circle like yours, I made a ‘flap’ instead, and it needs something above the flap to finish it off. I’ll put a link to your blog when I add it to mine. 😃✂️😃
PS think it’s going to be the 1st of many!!
Pingback: Peg Bag 1st attempt « Thimberlina ... my creative journey
Hi there, thank you so much for posting this, i am new to sewing so sorry for the basic question, but what is the difference between the front and front facing?
Not a problem, Claire. ‘Facing’ is another word for lining. The subtle difference is that a facing is often like a lining around edges, like armholes in clothes. To make a circular hole in the front, you use two bits of fabric – one on the outside that shows (front) and one on the inside that does not show but helps make a neat edge to your opening (front facing). I often use plain white or calico fabric for the front facing (lining) on these bags. Does that help? If not, let me know and I’ll try again to explain it more clearly.
Thats fantastic thanks very much! Will get cracking tonight ready for a christmas present 🙂
Hi there again, sorry for another question but I am a bit confused by step 4! I was wondering if anyone can help me as i am making this as a christmas present so i am now very worried!
The instruction says to have the front facing and the front right sides together, make a hole and sew along line. Snip the seam and then turn inside out. i havent actually done it yet but once i have sewn the front facing and front together theres no way of turning it inside out. Do you only sew it together to cut the hole and then unpick it?
sorry if i have missed something!
Claire
Hi, Claire! It is not as tricky as it seems. Once you have sewn the circle and snipped, it turns inside out surprisingly easy (this should be the only line of stitching on the two bits at this stage). No unpicking is needed. If you are nervous, take two scraps of fabric and try to make a hole (any shape or size) by sewing and turning it. A practice run should help clarify.
Hello, I’m confused about point 4 too :-$ I think I’ve done it wrong but can’t understand how as I’m sure I’ve followed the instructions….I can’t turn it inside out as it’s sewn together right sides facing? There’s no ‘gap’ to push through.. I can’t push through the circle as it’s sewn together… I’m sorry I’m new to this (sewing machine for Xmas and first project!)
Help!
Hi, Ann-Marie. New sewing machine? Cool!
Let’s just check where you are at: you have two bits of fabric sewn together with a circular line of stitching in the middle (no other stitching) and you have cut out the fabric from inside the circle (and clipped the seam allowance as pictured). Right? If what you are looking at does not look like that, let me know. If it does look like that, try turning just one layer through the hole in the middle. It is a weird manoeuvre, but it does work.
Thank you, I’ve got it now!! 😀
Thanks for letting me know. It is good to hear.
This is the best peg bag tutorial I have seen. I just made it in a couple of hours including some appliqué and it works wonderfully. It is so beautiful, clear to follow and ingenious!!! Thank you so much for sharing this!!
Thank you! I am glad you found it useful.
I have just started a Flickr group. If you have a Flickr account, I would love it if you posted a photo of your peg bag there. I have realised I am curious to see everyone’s different versions.
That’s WAY easier than the made up version that I made my mom years ago, maybe I’ll give this a try for her. Thanks
I must have been having a good day. I often like to complicate things unnecessarily! 🙂
This tutorial is just what I was looking for! Thanks so much for posting this! I have your pegs font ready to copy and am wondering what font that is that you used and if there is the entire alphabet available to match the PEGS letters? Thanks in advance…sue
Thanks, Sue. Sadly, that typeface, whatever it was, was on my old computer. I put it in as an example, but you can use anything. I would suggest choosing one that has few skinny bits. In other words, the letters are think enough at their narrowest parts to hold together as you sew them.
Pingback: My Swedish Peg Bag – Klädnyps-strut – in recycled denim | Sew, What's New?
Pingback: Planning a Sewing Workshop | Sew, What's New?
Just thought I would look for something different in a peg bag and I’ve found it. Just about to make myself one. Thank you
Thanks, Kathleen! I hope you are able to personalise yours with your own fabric choices and decorations. For example, I added a broderie perse flower to the one I gave my gran.
Must admit I made mine very simple for the first one as I was desperate for the peg bag but now intend to make some more as gifts. Brilliant idea.
Thanks for helping …so easy and so perfect……..thankyou grannymaud xx
Happy to help!
Thanks for the fab tutorial, just made mine today!
Excellent! I just checked out your photo. I love the colours you used, and the applique is pretty snazzy. You used a cutting machine, right? Maybe I want one of those now! 🙂
Pingback: Peg Bag Envy And Upcycling a Sports Shirt | T H I M B E R L I N A
Thank you so much for sharing your knowledge and talent with us. I have just followed your tutorial and made my first ever peg bag! I am thrilled with it!! Thank you so much.x
I am glad to hear it worked for you, Carole.
Just starting to teach my daughter-in-law how to use a sewing machine. This is a great first project. Thanks for the very clear and understandable tutorial.
Pingback: Proud parent | Granny Maud's Girl
Thanks for the tutorial. Its on my to fo list, which is constantly growing
Just made a slightly modified version with a larger semi-circle instead of a circular opening. Love it! Thanks a million!
Pingback: Laundry bag | Granny Mauds Girl
Thank you for your tutorial. So well explained. So easy. Just finished mine today.
Thanks for sharing this. It’s brilliant and I also got confused at step 4, but thanks to the comments and your replies it works a treat.
Thank you
I’m an a little confused. You say to pet your front piece and your front facing pieces together. See the circle, then cut leaving a narrow seam allowance , then clip. Then you say to turn right side out? How can this be possible? Are you supposed to leave an opening in your circle? Please clarify.
Hi, Nancy,
It sounds a bit odd the first time, I know, but it will work if you do it exactly as you explain. Do not leave an opening in the sewn circle – sew all the way around with the right sides together. When you cut out the hole in the middle, you can flip one piece through the hole in the middle, and this turns things right side out. Experiment with a scrap of fabric or paper towel first, and you will see what I mean.
Please get in touch again if you still are having problems.
Cheers,
Carla
These all look so nice. In my neighborhood lots of people still put out clothes on the line as I do. First thing I put up when I moved into this house was a clothesline. Maybe for the little tiny hanger you can do a long tube that holds plastic bags with a opening at the top and an opening at the bottom
That’s the only idea I came up with too Debbie.